
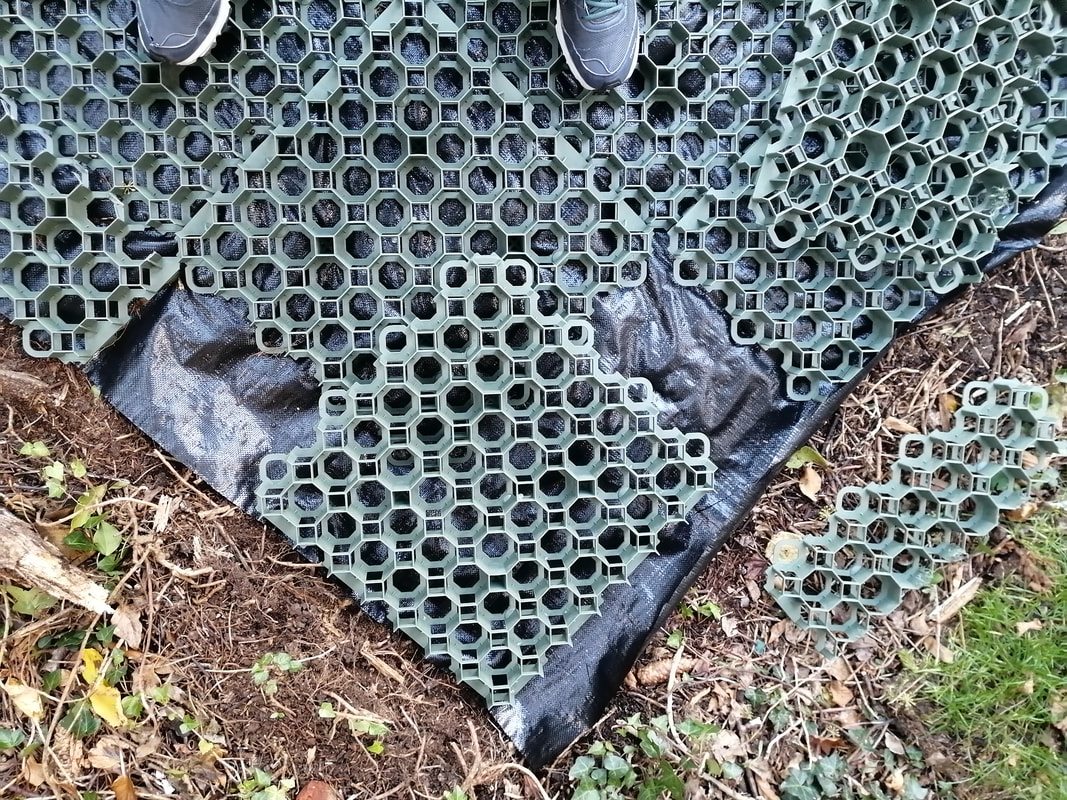
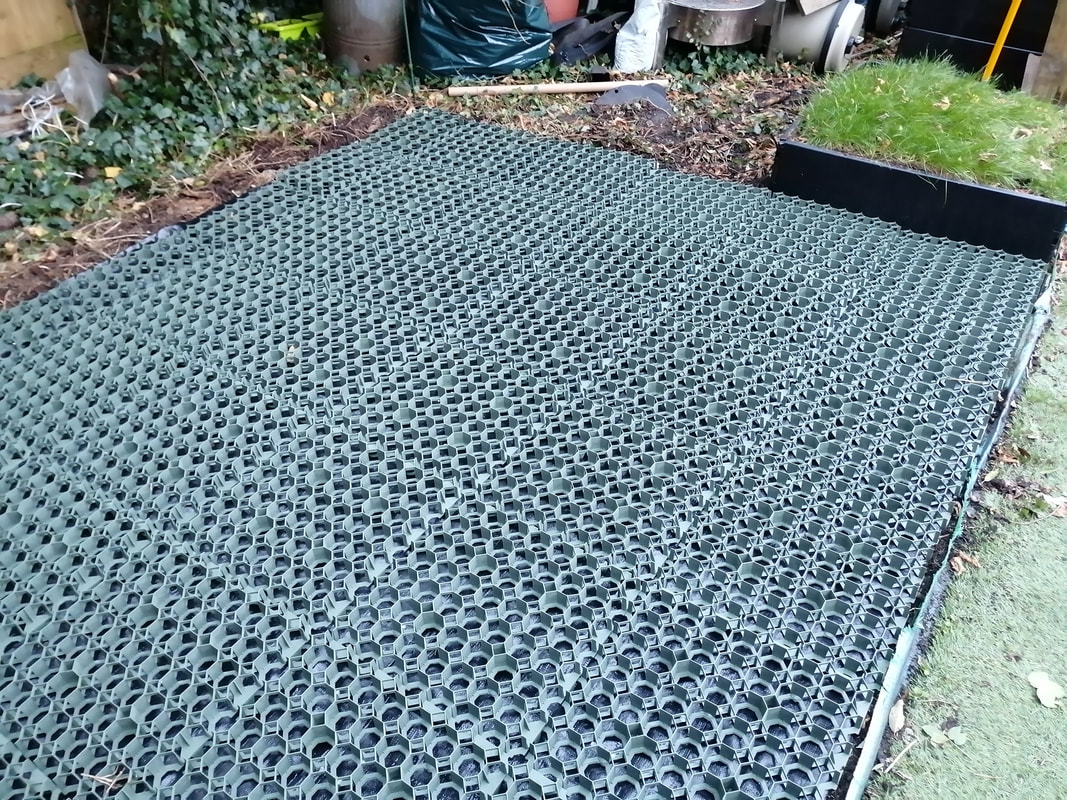
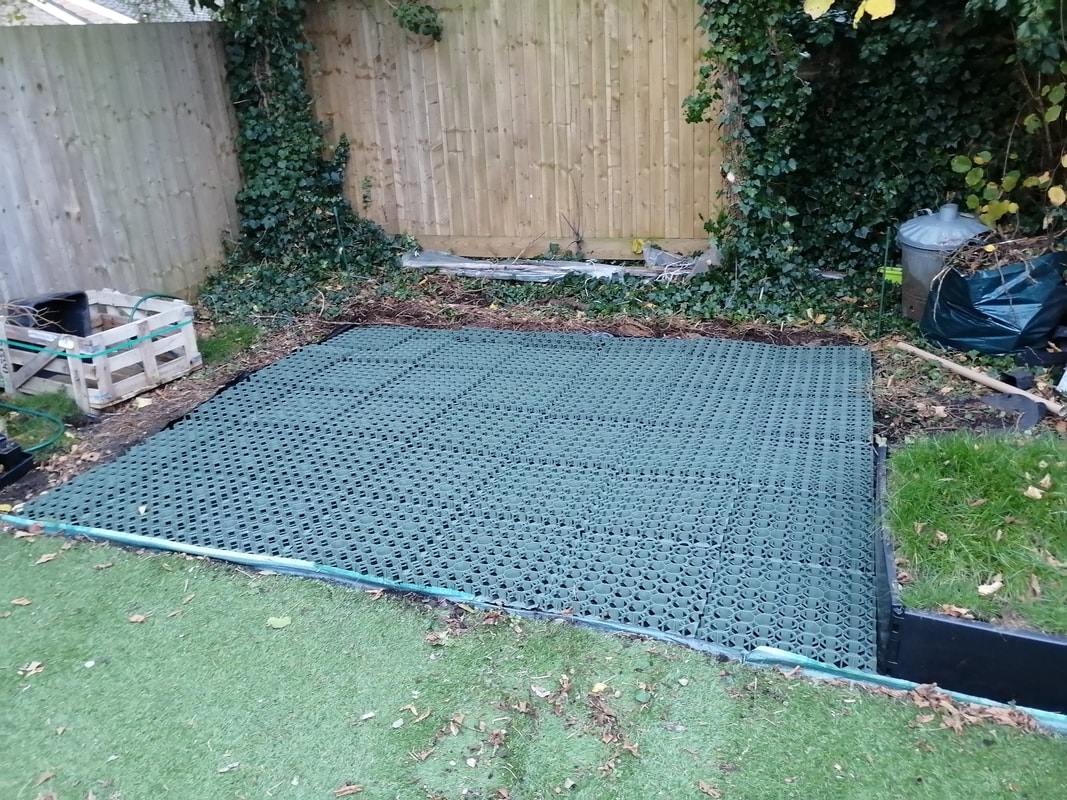
 Given the weather on Friday, and the fact that my right knee has decided it really doesn't want to work at the moment, we took a "planning day". However, having organized wheelbarrow assistance for Sunday, we at least needed to get the RapidGrid base tiles down today.  We'd already moved the grids and stuff in to the back garden, so it was a relatively straightforward task ahead of us... The weedproof matting supplied by Dunster House looked atomic grade - certainly the chunkiest I've ever seen. We were supplied with two rolls, but covered our plot using just one. I have plans for the second one... Having laid out the matting, we started laying out the tiles and suddenly the penny dropped about how the tiles locked together. Two adjacent sides had teeth protruding downwards which locked into the matching loop of the next tile, and there were little feet down the centres to support the middle of the tile. Did along the front and right hand edges, then filled in from front to back. Dave was laying the tiles and I was hobbling around bringing them over a few at a time. Although we'd been supplied enough for a 6x7 grid, we'd already decided that was too big, and that our cabin didn't need that much space, so we'd worked to clearing and levelling a space for 5.5x6.5. We had to do a little extra excavating down the sides where I'd gone a bit curvy but they seemed to go down pretty well. When we got to the half tiles, Dave plied his trusty circular saw to trim to size (our plot was deeper on the RH side, so they weren't all exactly halves) after getting his head around the topography of the locking teeth and feet. Having cut the side tiles and leaving them to me to lay, he worked his way along the back. We met at the tree corner and decided that the tree root had to go after all. A combination of the loppers and the reciprocating saw removed a good foot of chunky root plus a few ancilliaries, then when the mat went back down, the corner laid much better. I was left to do a bit of tidying and trampling, and also measuring, to make sure we did actually have enough space. We did, but it would be tightish in the tree corner where the half tiles all met and I didn't think that the combination of partial tiles would be a good combination in that spot, so we decided to go for an L-shaped tile to cover the corner in a single piece (well, the actual corner was a full tile, nestling into an L within the main grid) then fill in the gaps with offcuts. I have to say, it doesn't look that flat at the moment, but that's what the pea shingle is for. Apparently, the floppy grid goes really rigid once the pea shingle hits it... I hope so!
0 Comments
Your comment will be posted after it is approved.
Leave a Reply. |
Archives
November 2023
Categories
All
|
 RSS Feed